last modified: 2018-03-16
1. Explaining the workflow
We are developing an app on NetBeans, with a plugin with installed, called "Codename One".
But how do we go from there to an app available on the Play Store (for Android phones and tablets) or Appe’s App Store (for iPhones and iPads)?
The workflow has several steps:
-
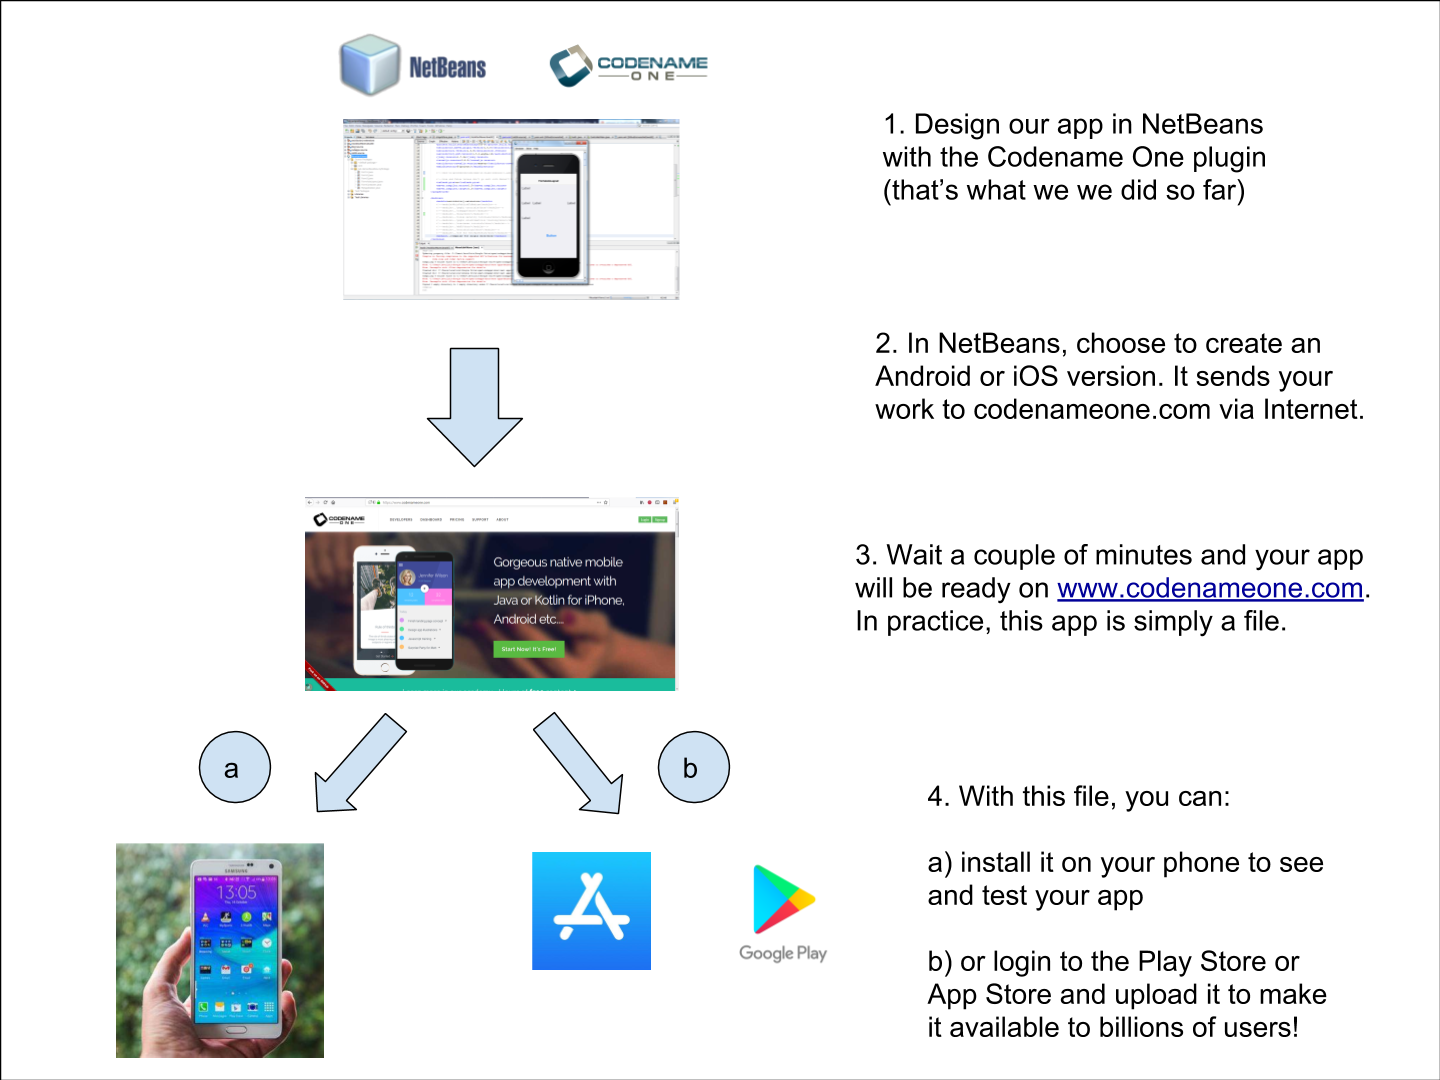
we design our app in NetBeans until we are satisfied with it and ready to test it on a phone
-
then, we choose in NetBeans if we want to create an Android or an iPhone version of our app.
-
we send our app to www.codenameone.com which is the website of the company providing the plugin we use.
-
Codename One transforms our app into an Android app or iPhone app (depending on what we selected). In practice, it is a single file which is created.
-
we can download this file on our own phone if we want to test the app.
-
or we download this file and place it on the website of the App Store or the Play Store if we want to release the app publicly.
These steps can be illustrated simply:
So we see that there is a few interconnected parts: NetBeans, the website of Codename One, the app platforms by Google and Apple…
We present you now the setup you need to test and release your app, common to Android and iPhone app releases.
You will need some additional steps specific either to Google or Apple’s app platforms, but we leave these for separate lessons.
2. General setup
a. Create a free account on Codename One
Codename One is the company providing the open source plugin we use in NetBeans.
Codename One will convert our app into an Android app. So we need to create an account with them.
They have several pricing plans:
-
the free plan. It gives you access to everything but puts a size limit on your app.
-
the basic, pro and entreprise plans, which give extra capabilities.
In the CODAPPS course we use the free plan.
To create your account, go on www.codenameone.com and just sign up for an account:
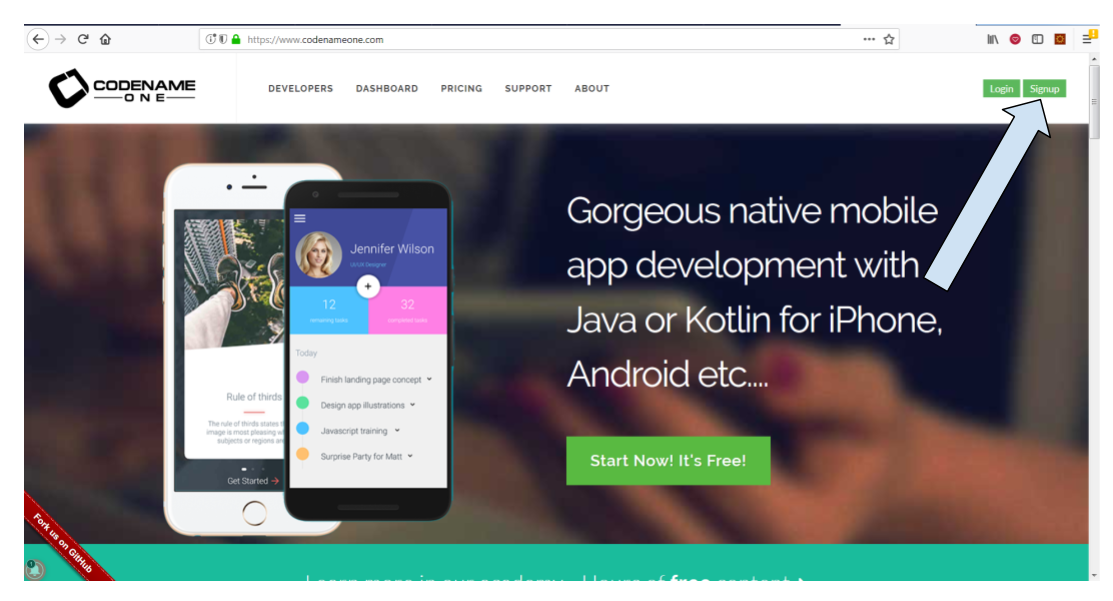
Make sure you remember the email and password you used to sign up as we will need them later.
b. Connect NetBeans to your Codename One account
In NetBeans, right click on the name of your project and select Properties:

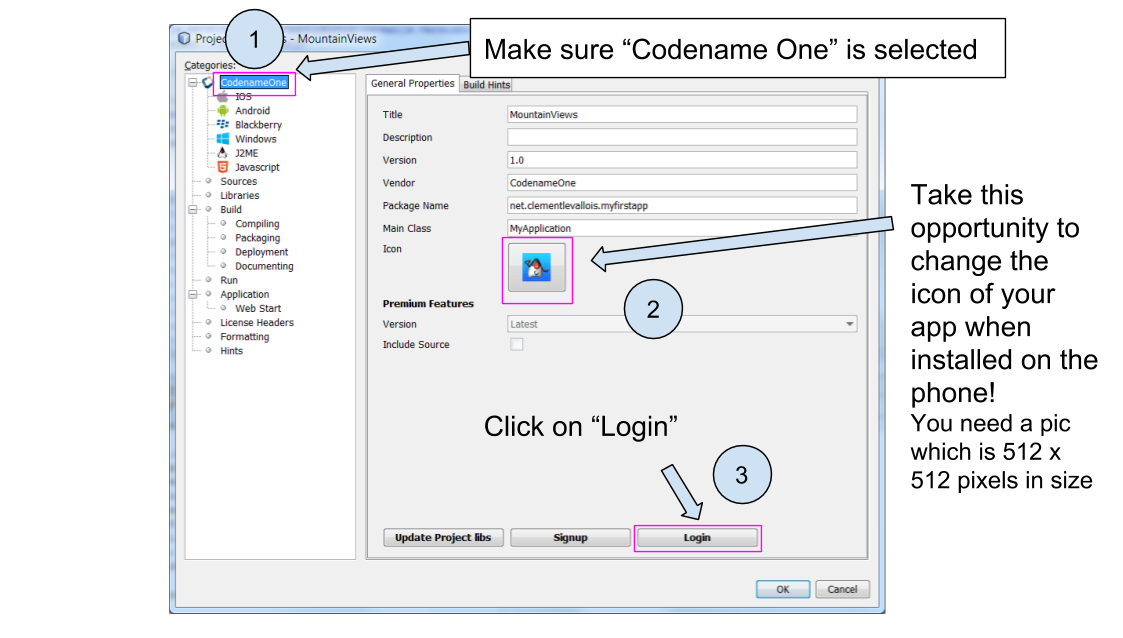
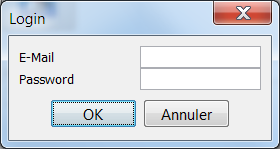
A login window opens. You should enter the email and password of the account you created on the Codename One website (see above in the lesson).
This is how NetBeans will be able to send the app you created to the Codename One website!
Then close all the windows we opened by clicking on OK.
c. Set up your phone to accept apps from unknown sources
This step is necessary only for testing the app on your phone. For security reasons, your phone accepts to install only apps coming from official app stores.
You must unlock this feature so that you can test your own app.
The latest versions of your phones might invite you to unlock when you are installing your app, but on older phones you need to do it beforehand:
-
go to the parameters of your phone
-
in the security settings, switch on the "install from unknown sources".
This website provides an illustration for Android phones:
(Depending on your phone and version of Android, your screens will look slightly different)
|
Make sure to switch off this parameter after you installed your app. |
d. Install a QR code reader on your phone
QR codes are very common and you surely have seen them before, they look like:

We need an app on our phone to read QR codes, because this is how we will transfer our app onto our phone (fancy!).
Just go on the App Store, search "QR code", and install a free app doing QR code reader.
3. Anticipating the differences between Google Play and Apple’s App Store
Apple and Google have two different business strategies for their app stores:
| Google’s Play Store | Apple’s App Store | |
|---|---|---|
Developer program membership (price to pay) |
one time payment of 25$ |
90$ every year |
Testing the app on a phone is possible without a membership |
yes |
no / very difficult |
| Google’s Play Store | Apple’s App Store | |
|---|---|---|
Tools needed for the release |
PC, Mac or Linux |
Mac only |
Policy to accept apps on the Store |
all apps are welcome |
Apple rejects the app if it does not provide a "valuable" service |
Time to get the app on the Store |
3 hours |
several days |
We see a pattern here:
-
Google has an approach where apps are like websites: everyone has the right to publish one, as long as they are legal / not offensive etc. This makes for a very large app store, with apps which are of varying quality.
-
Apple has a qualitative, closed approach. They decide who has the right to enter their ecosystem, and they reject what they consider to be "low quality" apps.
These different strategies have consequences for operational and financial figures:
-
Google Play includes a large volume of apps, with low revenues per app (because many apps are simple and non pro)
-
Apple’s App Store includes fewer apps, but these apps are carefully selected and often made by companies which make revenues from them

And there are consequences for developers like you as well:
-
it is relatively easy and cheap to release an app for Android phones and tablets
-
it is much trickier to release for Apple’s App Store, or even to test your app on your own iPhone!
The next lessons will guide you through the process of testing and releasing your app in both cases, but be prepared for a longer process in the case of Apple.
The end
Questions? Want to open a discussion on this lesson? Visit the forum here (need a free Github account).
Find references for this lesson, and other lessons, here.
Licence: Creative Commons, Attribution 4.0 International (CC BY 4.0). You are free to:
-
copy and redistribute the material in any medium or format
-
Adapt — remix, transform, and build upon the material
⇒ for any purpose, even commercially.
 This course is designed by Clement Levallois.
Discover my other courses in data / tech for business: http://www.clementlevallois.net
Or get in touch via Twitter: @seinecle